|
I've had a lot of fun over the years building boxes of
all shapes and sizes.This one was made as a travel humidor
for a friend. The box can just as easily be used for a travel
jewelry box, eyeglasses—you name it.Whatever its use, the
real crowd pleaser is the silky smooth sliding action as the
box is opened: it always brings a smile.
I like working on small-scale projects. Materials are easy
to find and afford. (I get my best wood from my scrap pile).
Working on a small scale gives me a chance to do more
handwork than time normally allows on a large project.
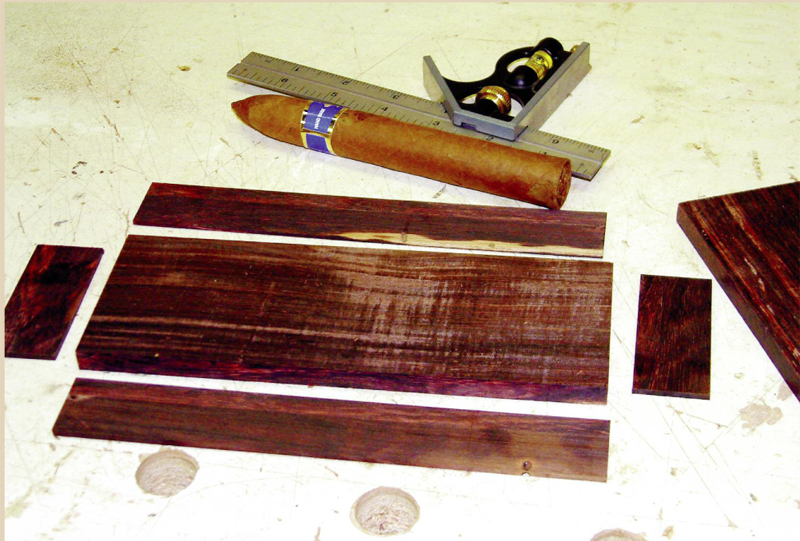
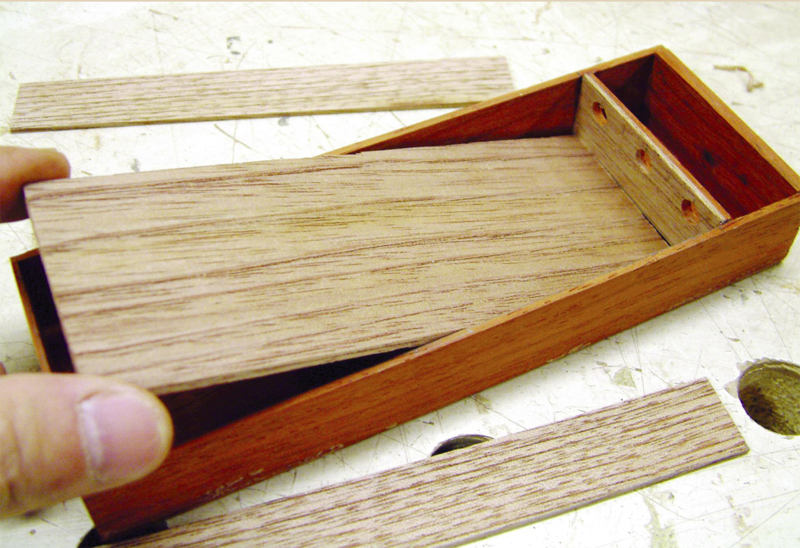
I sized this humidor to fit three Corona cigars (Photo 1).
If you aren’t a cigar person, just eliminate the humidifier
and Spanish cedar. Then,modify the box dimensions to fit
eyeglasses, pens and pencils, jewelry—anything that needs
to be contained while bouncing around in a backpack,
purse or suitcase.
Build the Boxes
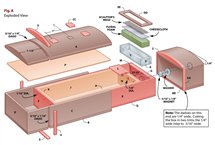
1. Cut the parts for the outer box (A-D, Fig. A, page 58) to
size. It’s best to resaw the thin stock from thick boards.This
method ensures
grain and color uniformity.
It also conserves on material.
My multi-purpose tall fence makes quick work of this task.
Size your humidor to fit the desired product.
2.Use water-resistant glue to attach the sides to the bottom.
Do not glue the top on yet.Note:Make sure the box is
perfectly square.
3. Epoxy a thin washer or other slim piece of metal inside
one end of the box.
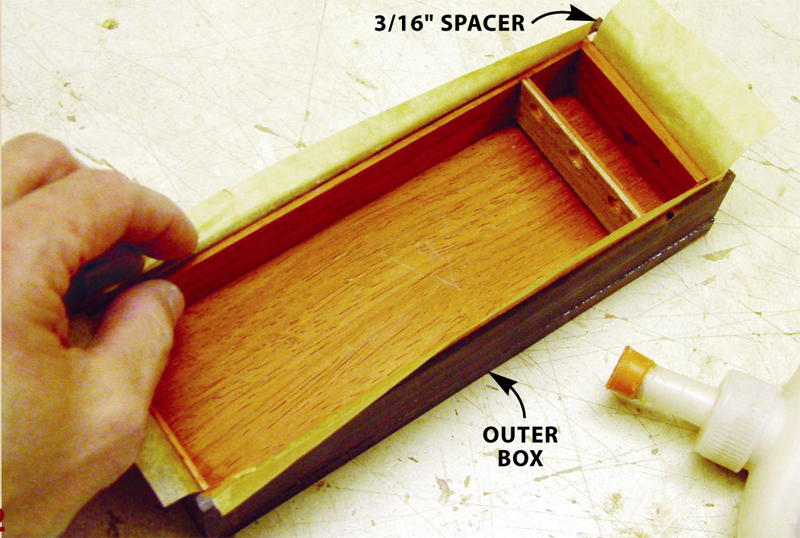
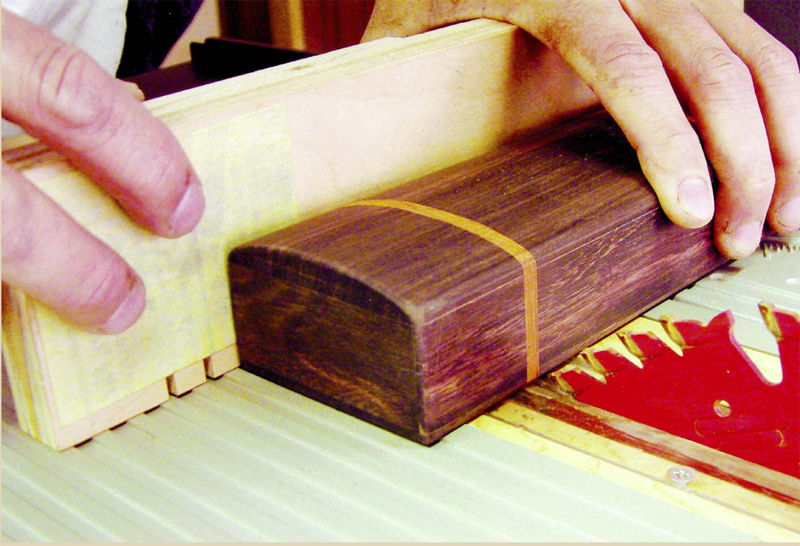
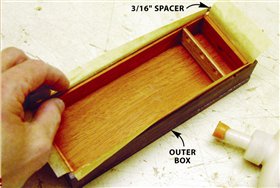
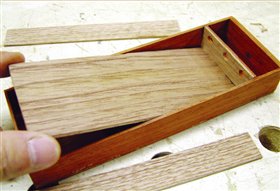
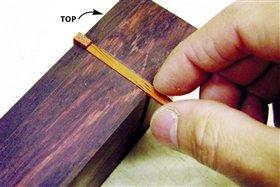
4. Cut all the inner box parts to size, using the outer box
as a guide (Photo 2).The inner box (E, F, G and Q) should fit
snugly in the outer box from side to side. But place a 3/16"
spacer in the washer end of the outer box, so the inner box
will fit after the outer box is cut in two.
5. Create the inner box divider by face-gluing the divider
(M) and divider lining (N).Drill three 5/8”dia. holes near the
top edge to allow air movement between the cigar compartment
and the humidifier.
6.Glue the inner box together using the outer box as a
form to insure a smooth, piston fit.
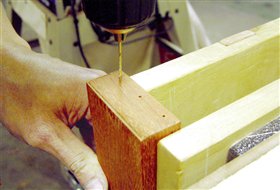
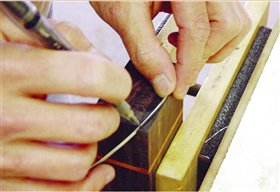
7. Cut the Spanish cedar linings (H-K) and install them
inside the inner box (Photo 3).
8.Glue on the top piece (L) so its edge is flush with the
edge of the divider.
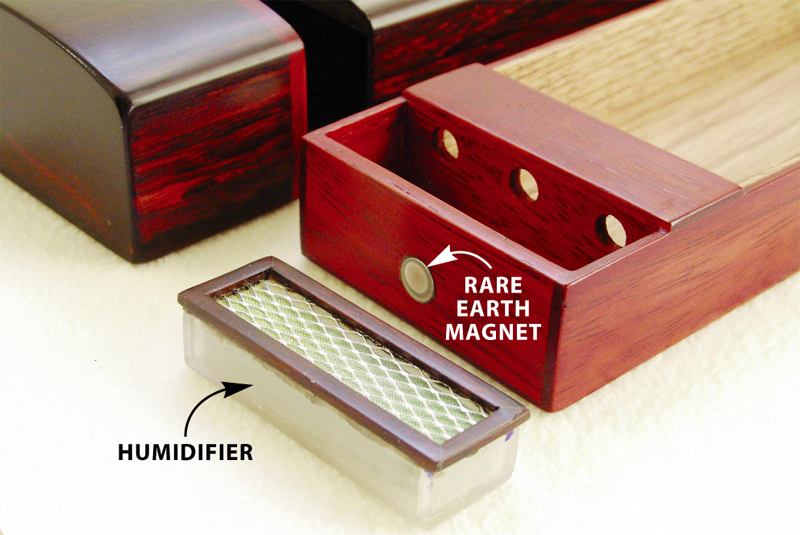
9. Drill a shallow hole and install a magnet on the outside
of the inner box end (G).Make sure the magnet
aligns with the washer mounted in the outer box.
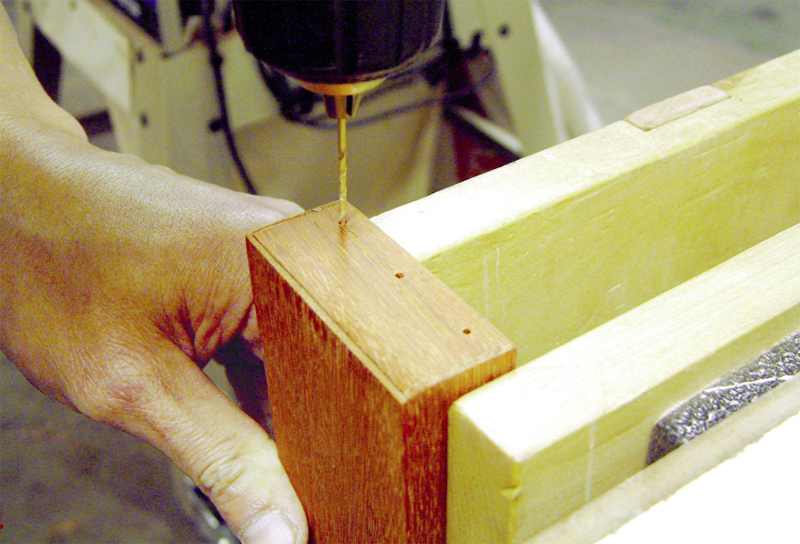
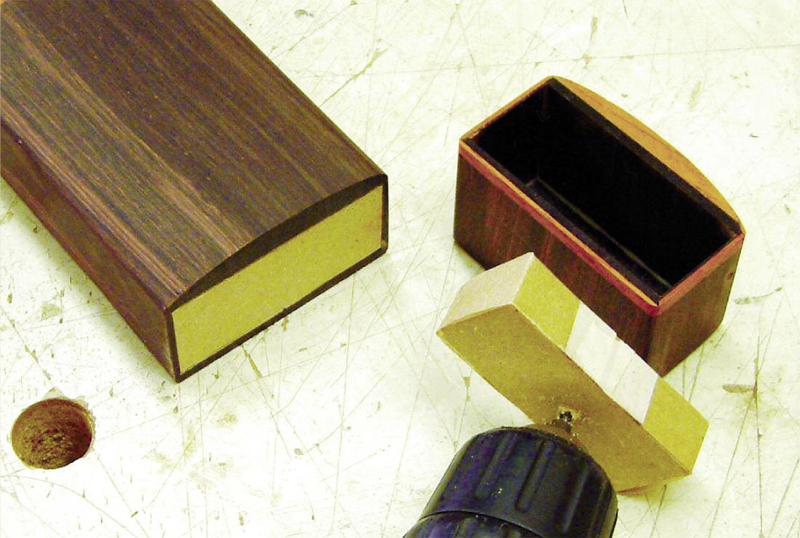
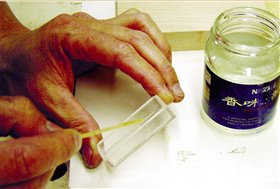
10. Drill some tiny holes at the opposite end
of the inner box to allow for air movement
when opening and closing the
humidor (Photo 4).
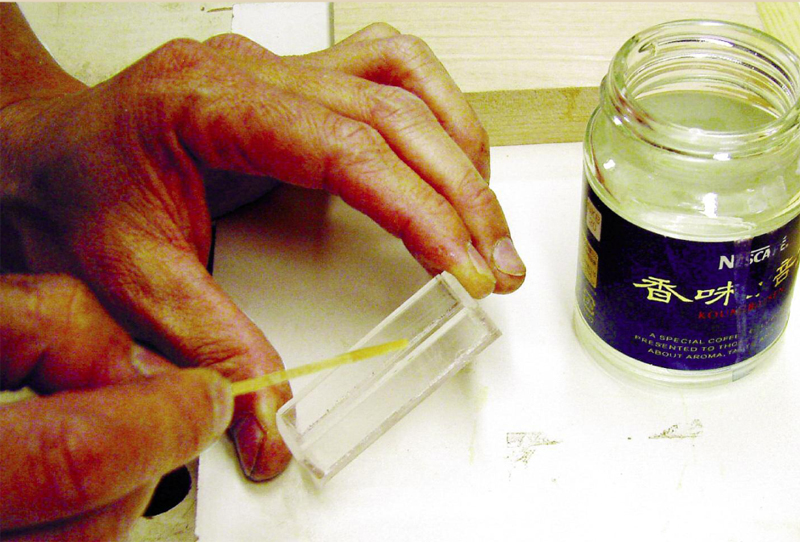
Build the Humidifier
11. Cut the humidifier parts (R-T) and
assemble with plastic adhesive (see
Source, below, and Photo 5).
12. Cut some green floral foam (available
at hobby stores) to fit tightly in the humidifier
and install it. Cover the foam with cheesecloth or
similar fabrics to allow the moisture to move freely.
13. Cover the cloth with sculpture wire mesh (available
at hobby stores).Glue the wire mesh and the cloth
on the rims of the Plexiglas box.
14. Build the humidifier frame (DD&EE) around the top
edges of the humidifier. Make the frame a bit oversize so
that you can trim it flush with the humidifier compartment.
Complete the Outer Box
15. Set the assembled inner box in the outer box.Cut the
top lining (P) to size and position it on the inner box, so it
covers the opening. Spread a thin layer of glue on the back
of the lining.Then press the top in position on the outer box
and clamp lightly.
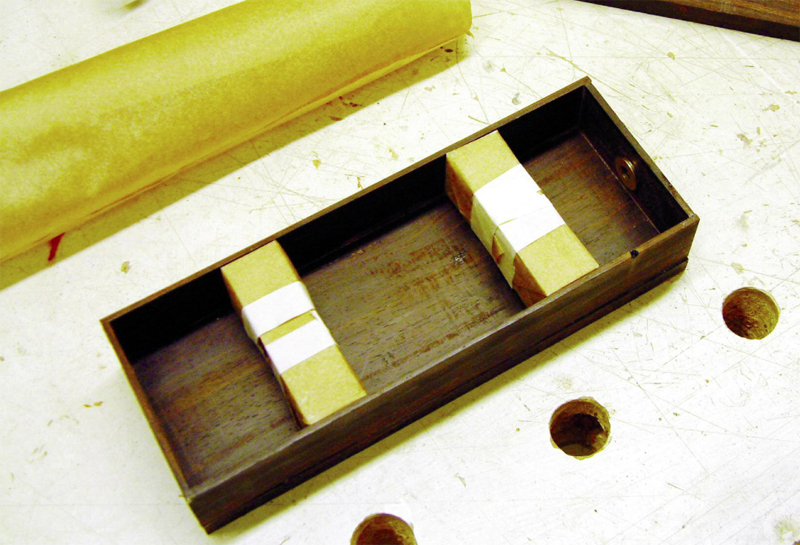
16. When the glue has dried, remove the top and the
inner box. Install a pair of temporary support
blocks in the outer box (Photo 6). Locate the
blocks so they are roughly centered where the
inlay dadoes will be cut.
17.Mark the humidifier end of the box so you can
identify it once the top is glued on. Note: If you forget to
mark the humidifier end, you can always find it using a
magnet.You’ll feel the pull on the correct side.
18.Glue the top to the box. After the glue has dried,
sand all the edges flush.
Create the Inlays
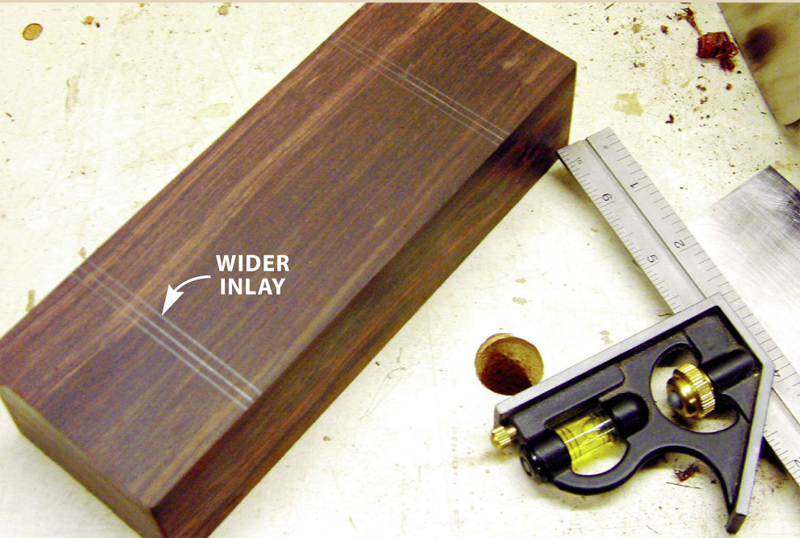
19. Mark the inlay and decorative button locations on
the box (Photo 7).
20. Cut the inlay dadoes on the tablesaw. Cut 1/16"
deep dadoes in the sides and bottom of the box and 1/4"
deep dadoes in the top (Photo 8).
21.Cut the inlay pieces (U-BB) and glue them in place
(Photo 9). Saw the ends flush and then remove the saw
marks by sanding.
Shape the Top and Add the Buttons
22. Lay out the curve on the top (Photo 10). Plane the
curve and sand it smooth (Photo 11).
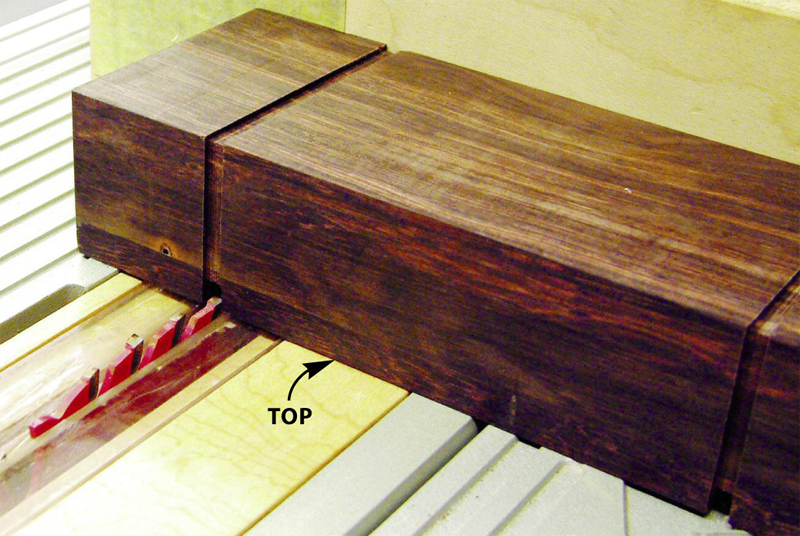
23.Now cut open the box. Raise the blade
above the box and center it on the inside glue
line of the wider inlay.
24. Cut the box in two (Photo 12).
25. Pull out the support blocks from inside
the box (Photo 13). Use a long auger bit to
grab the support block that’s deep inside.
26.Drill holes for the decorative buttons.
Square the holes with a chisel (Photo 14).
27.Glue in the buttons (CC).
28. Finish-sand to 220 grit. Spray the outside
of the box with gloss lacquer and rub it
out to a satin finish.
29. Install the humidifier (Photo 15).
Source
(Note: Source information may have changed since the original publication date.)
Ridout Plastics, eplastics.com, 800-474-3688, IPS Weld-On #16 Plexiglass Acrylic Glue, #IPS16-1.5OZ, $4.58 for a 1.5 oz. tube.
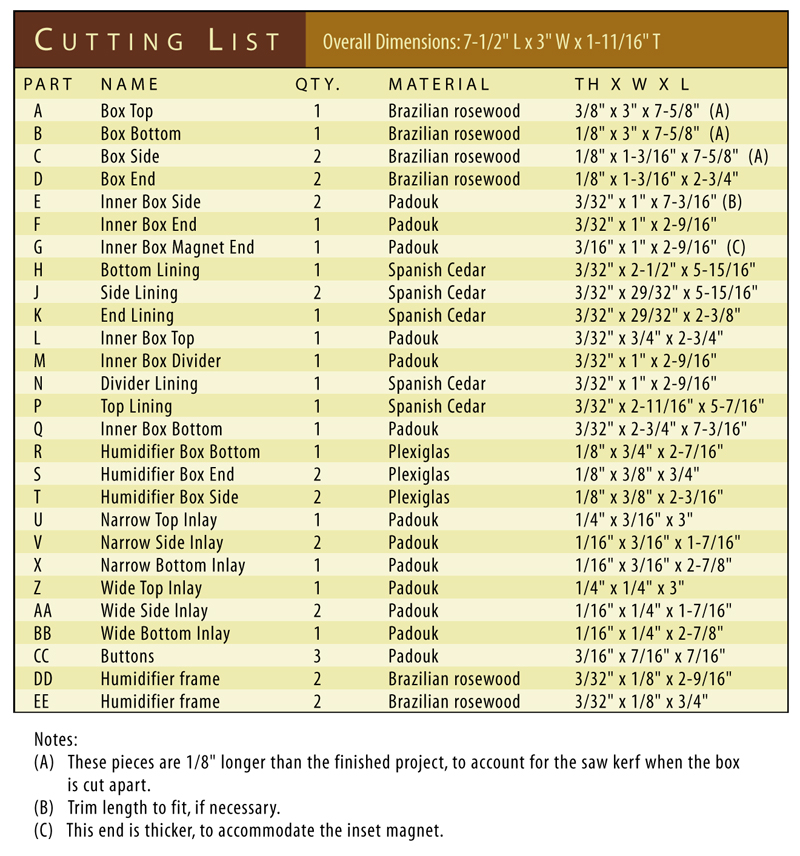
Cutting List
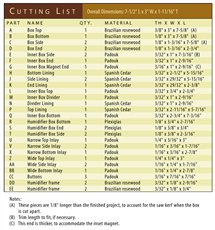
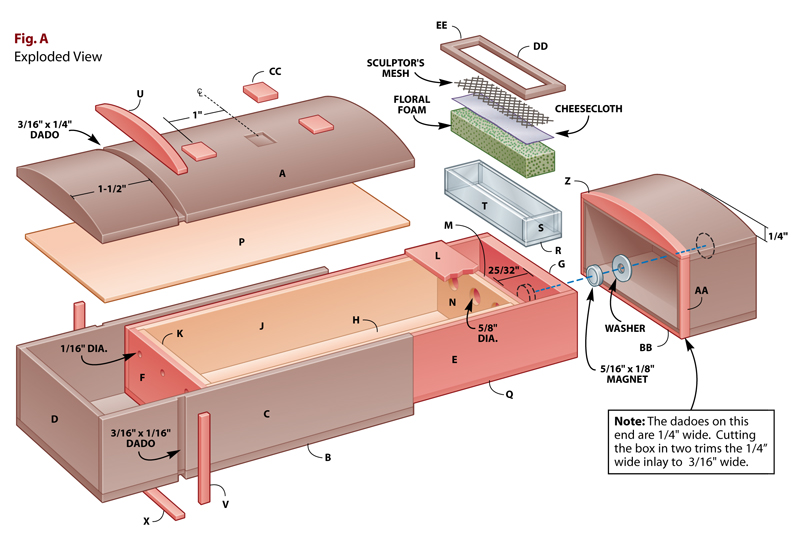
Fig. A: Exploded View
This story originally appeared in American Woodworker April/May 2009, issue #141.

April/May 2009, issue #141
Purchase this back issue.
|
Click on any image to view a larger version.
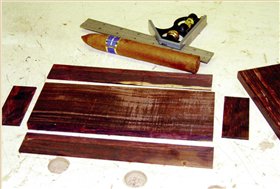
1. Build the outer box from a single piece of Brazilian rosewood
that’s been resawn into thin boards. Size the pieces to fit the
objects you’ll be carrying.
2. Custom-fit the inner box by using the outer box as a form.Wax
paper prevents the boxes from sticking to each other and provides
the side clearance for a piston fit.
3. Remove the inner box from the outer box and line it with
Spanish cedar. Be sure to use water-resistant glue.
4. Drill air-escape holes in the end of the inner box.These holes
allow the boxes to slide smoothly past one another.
5. Build a Plexiglas humidifier to keep the cigars fresh.
Assemble the box with plastic adhesive.

6. Place wood blocks wrapped in wax paper inside the box.The
blocks support the walls when the inlay dadoes are cut and act as
a backer when the box is cut in two.
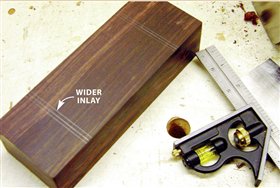
7. Lay out the inlays on the box after the lid is glued on.The
inlay on the humidifier end of the box (the end with the washer)
is 1/16" wider. The extra width will be removed when the
box is cut open.

8. Cut the grooves for the inlays.The groove in the top is extra deep
to allow for shaping the lid.
9. Install the inlays. Start with the top piece, then add the side
pieces. Fit the bottom inlay last, to minimize exposed end
grain.
10. Lay out the curve on the top with a piece of flexible steel.Hold the
steel at the center of the top and bend it to create the curve.
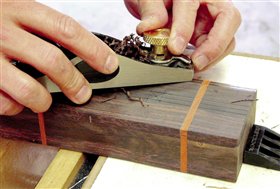
11. Plane and sand the gentle curve on the top.

12. Cut the box open with a single pass on the tablesaw.
Position the box so the blade is centered on the inner
glue-line of the wider inlay.

13. Extract the support blocks by drilling a hole at a slight
angle. Stop the drill and pull out the blocks.
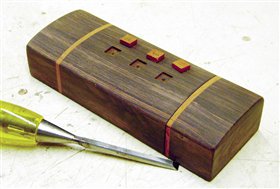
14. Cut the recesses for the buttons with a brad point bit
then chisel them square.
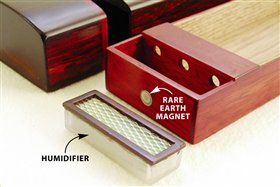
15. To access the humidifier for recharging, pull the short
end of the outer box off the inner box and lift the
humidifier out of its compartment. The outer box has a rare
earth magnet embedded in one end. The outer box has a
washer glued to the inside of the short end.
|